Quickstart
Get up and running with the Supabase plugin
This guide is designed to help you set up and connect a Supabase project with a Bubble.io app using the Supabase plugin. We'll use the example of a simple Todo app to guide you through the following steps:
- Supabase setup
- Configuring the plugin
- Implement user signup and login
- Managing user profiles
- Implementing a Todos table
- Setting-up the API connector
- Managing your Todos
- Structuring your app
If you need any assistance or have questions while working through this guide, please feel free to reach out for support
Supabase setup
1.1. Create a Supabase account
Create a new Supabase account from here. If you already have an account, simply login.

1.2. Create a project
Now let’s create a new project named Todo App within your Supabase organization.
This project will serve as the backend for your Bubble.io app.
1.3. Get your project settings
You can copy the following elements; we'll need them to set up the plugin:
Supabase URL(Project Settings / API / Project URL)Supabase Anon Key(Project Settings / API / Project API keys)
To ensure a clear separation, you should create two separate Supabase projects: one for testing and another for production. These projects should correspond to your Bubble.io testing and live environments, respectively.
Configuring the plugin
Now, we will configure the plugin to works with the Todo App project.
- If you have not already done so, install the plugin from here
- After installation, go to the Plugins Tab on your Bubble.io editor and find the Supabase plugin
- Enter the
API URLandAnon Keyfrom your Supabase project dashboard into the respective fields
The Supabase Log Level parameter can be set to
debug, info, or error.
This parameter controls the log messages displayed in the developer console.
You can use debug for detailed logs in a test environment and error for
minimal logs in a live environment.
Implement user signup and login
We'll now implement a simple popup form in our Bubble.io app, enabling users to sign up and login using their email.
3.1. Disable the confirm email option
To make things simple for this guide, we'll disable the Confirm email
option on Supabase. This means users will not need to confirm their email
address before signing in for the first time.
3.2. Implement the signup form
First, we create a reusable "auth UI" and include
the Supabase Auth component within it.
Then, we create a group "Signup" in our reusable and add
the following elements:
- An email and a password input
- A submit button
You can then initiate a workflow when the user clicks on the submit button.
This workflow triggers the Sign the user up action, using
the email and password fields from our signup form.
You can use the Status Code state in the Supabase Auth component,
which can be either success or failed and the Status Message state
as shown in the video below:
The signup process is now implemented, and you should be able to register your users in your Supabase project.
Please note that you can fully manage your users on Supabase using the plugin. There is no need to use any user-related actions or the Bubble.io users database. If you're considering migrating your users from Bubble.io to Supabase, you can explore the process on our demo page.
Ensure that a Supabase Auth component is visible on every page of your app.
This is crucial because this component initiates the connection with your
Supabase instance.
Note that you can have multiple instances of the Supabase Auth component.
3.3. Implement the login form
The process for login will be similar.
We create a group "Login" in our reusable and add
the following elements:
- An email and a password input
- A submit button
You can then initiate a workflow when the user clicks on the submit button.
This workflow triggers the Log the user in with password action, using
the email and password fields from our login form.
Managing user profiles
This step is not mandatory, but we highly recommend that you do it.
4.1. Setting-up
When a user registers, Supabase stores information such as a unique ID, email,
and password in the auth.users table.
To ensure security, the auth schema is not publicly accessible by default.
If you want to easily store and retrieve user information (like first name, last name, etc.), you can implement a profile table in the Supabase public schema and then set up a trigger to automatically populate this table every time a new user signs up for your app.
You can use the User Metadata field in
the Create a New User action to automatically set the profile values
upon signup.
You can follow this guide to implement this feature.
4.2. Configuring the API connector to manage profiles
Now that our profiles table is set up and user profiles are automatically created upon signup, we can configure the API connector in our Bubble.io app to handle user profiles.
Let's say that we want to store the following elements for each user:
- First name
- Last name
- Bio
- Avatar
Then, our JSON schema for profiles will look like this:
Profiles schema
{
  "id": "",
  "first_name": "",
  "last_name": "",
  "bio": "",
  "avatar": ""
}
Configuring the API connector:
- If you have not already done so, install the
API Connectorplugin on your Bubble app - Go to the API Connector settings and click on
Add another APIif you have not yet configured an API related to Supabase - Enter a recognizable name for the API, such as
Supabase DB - Add a new API call, such as
Profile - Click on Manually enter API response and copy/paste the JSON schema
- Save this response
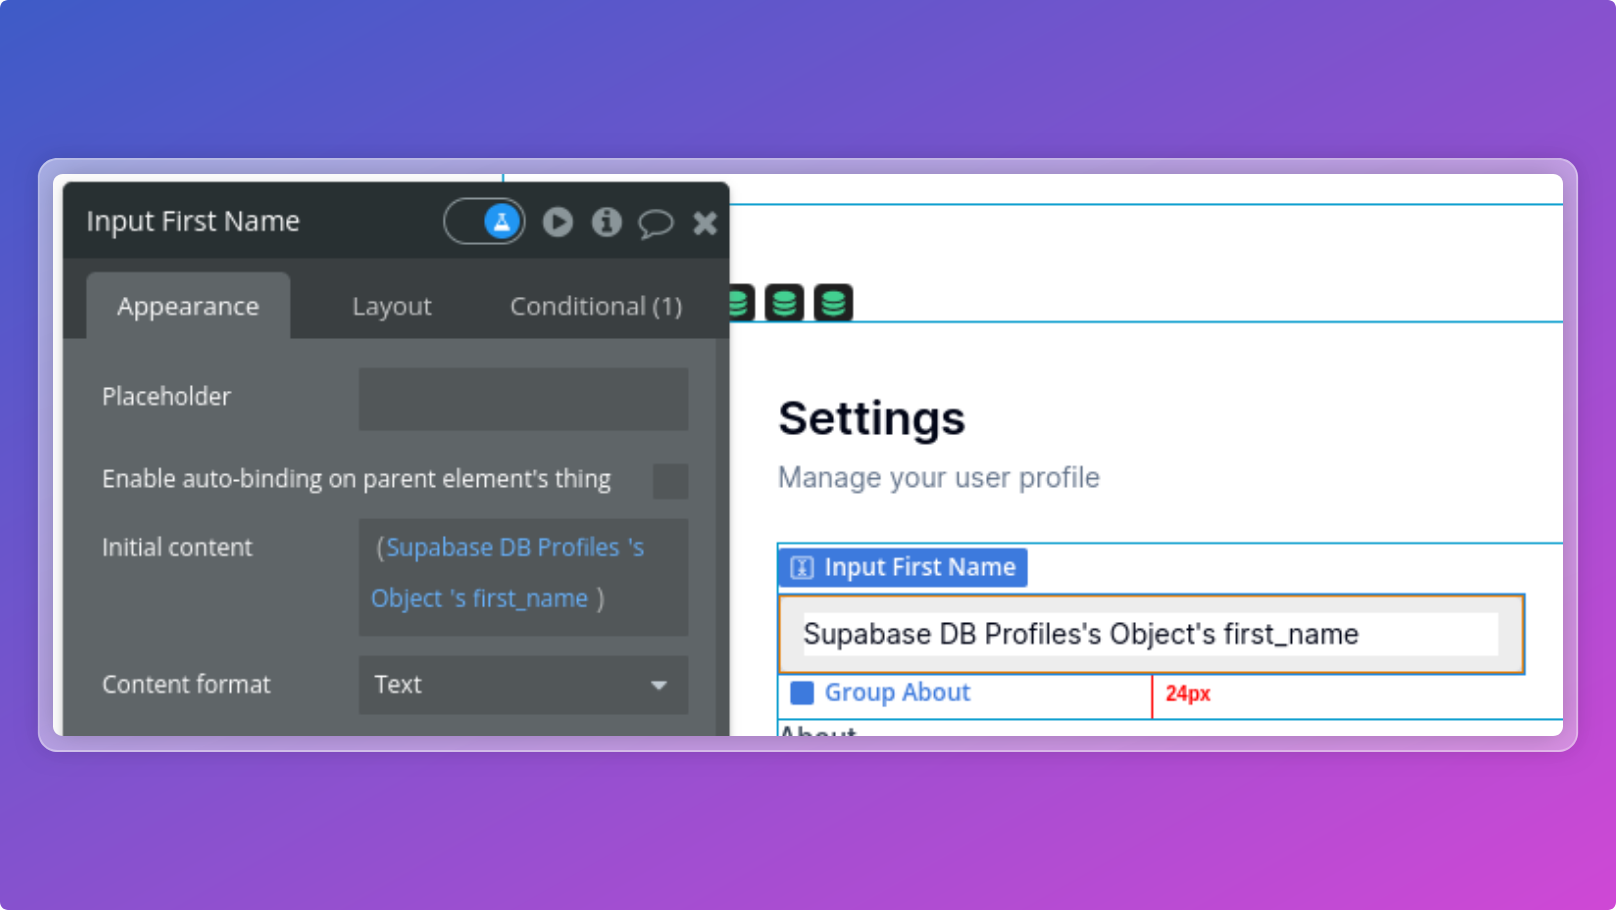
4.3. Fetching the profile associated with the current user
Now, let's say we have a settings page and want to be able to display the profile for each user.
First, add a database component to your page, setting Profiles as
the Data Type and profiles as the table name.
If you have followed this guide then you should have RLS in place making sure users can only:
- View their own profile
- Update their own profile
With RLS in place you do not need to set any filters and can call the Fetch action to get the current user's profile.
Great! The profile associated with the current user will be automatically fetched.
As only one object will be retrieved, you can access the values through the object
state of the database component.
4.4. Updating the profile associated with the current user
To update the profile of the current user, simply call the Update action
using the same filters as for the Fetch.
To enable your users to upload their avatars, you can follow the instructions provided in our guide here
Implementing a Todos table
5.1. Implementing a todos table on Supabase
Next, we will create the table that will store the data for our Todos example app.
You can use the SQL editor in the Supabase dashboard to create the table.
Below is a simple CREATE TABLE statement for the Todos table:
SQL - Create the todos table
CREATE TABLE todos (
  id SERIAL PRIMARY KEY,
  user_id uuid NOT NULL REFERENCES auth.users(id) ON DELETE CASCADE,
  title TEXT NOT NULL,
  completed BOOLEAN DEFAULT false,
  created_at TIMESTAMP DEFAULT CURRENT_TIMESTAMP
);
Note that the model is intentionally simple for the purposes of this guide.
5.2. Set up Row-Level Security (RLS) policies
We'll now implement Row Level Security (RLS) in Supabase for your todos table that allows users to create, retrieve, update, and delete only their own todo items.
Enable RLS (Row Level Security)
ALTER TABLE todos ENABLE ROW LEVEL SECURITY;
And create an RLS for each action:
Insert
CREATE - Allow authenticated users to create todos
CREATE POLICY "Allow authenticated users to create todos."
  ON public.todos
  FOR INSERT
  TO authenticated
  WITH CHECK ( auth.uid() = user_id );
Get
GET - Allow users to retrieve only their own todos
CREATE POLICY "Allow users to retrieve their own todos"
  ON public.todos
  FOR SELECT
  TO authenticated
  USING (auth.uid() = user_id);
Update
UPDATE - Allow users to update only their own todo
CREATE POLICY "Allow users to update their own todos"
  ON public.todos
  FOR UPDATE
  TO authenticated
  USING (auth.uid() = user_id);
Delete
DELETE - Allow users to delete only their own todos
CREATE POLICY " Allow users to delete their own todos"
  ON public.todos
  FOR DELETE
  TO authenticated
  USING (auth.uid() = user_id);
5.3. Enabling Real-time
In addition, you have the option to enable real-time functionality in Supabase. By doing so, your Bubble.io app will automatically update and reflect any changes in the data in real-time.
Enable real-time updates
alter publication supabase_realtime add table todos;
Setting-up the API connector
6.1. Extract the table schema from Supabase
The first step when you want to manage Supabase data from your Bubble app is to initialize the data model of your table inside the API Connector.
This step must be performed for each table you
want to manage through your Bubble.io app.
Please note that you can have as much Database
component as you want on your page.
Let’s first create an entry in our todos table to be able to extract the schema easily later:
Now, we will retrieve the todos item that we just created in the previous step, in JSON format.
Go to the Supabase SQL editor, select your table todos, execute the following request and click on Copy cell content.
Enable real-time updates
SELECT row_to_json(t) as json_schema
FROM (
  SELECT * FROM todos
  LIMIT 1
) t;
The schema copied should looks like this:
{
   "id": 0,
   "user_id":"",
   "title":"",
   "completed": false,
   "created_at": "2023-11-29T12:00:00.383716"
}
6.2. Paste the schema to the Bubble.io API Connector
- If you have not already done so, install the
API Connectorplugin on your Bubble app - Go to the
API Connectorsettings and click on Add another API - Enter a recognizable name for the API, such as
Supabase DB - Add a new API call, such as
Todos - Click on Manually enter API response and copy/paste the JSON schema
- Save this response
Managing your todos
🚀 Great job! You can now effortlessly manage your todo items from your Bubble.io app!
Please note that you can have as many database components as you want on your page.
7.1. Fetching your todos
First, add a database component to your page, setting Todo as
the Data Type and todos as the table name. Please note that you
can have as many database components as you want on your page.
You have the option to enable Fetch Data On Page Load?
and configure your fetch directly within the database component.
Alternatively, you can call the Fetch action (e.g. after the event "Auth state changed" has been triggered by the auth component)
as demonstrated in the following example:
Only the todos of the current user will be retrieved, thanks to the RLS that we had implemented before.
7.3. Insert a new todo
To insert a new todo, you can use the Insert action.
Please note that each Todo must have a reference to a user object.
To achieve this, we are setting the user_id field of our Todo
to the User ID state of the authentication component.
7.4. Update a todo
To update a todo, you can use the Update action.
7.5. Delete a todo
To delete an existing todo, you can use the Delete action.
Structuring your app
To simplify the management of your Supabase tables and facilitate the reuse of workflows, you can use Bubble reusable components. The main idea is to have:
- A reusable component for all actions related to authentication (containing the Auth component).
- A reusable component for each table you want to manage (containing the Database component).
Check this demo page for more details on how to implement this in your Bubble app.
Do you need any help? Feel free to reach out